Introduction and Product Tour
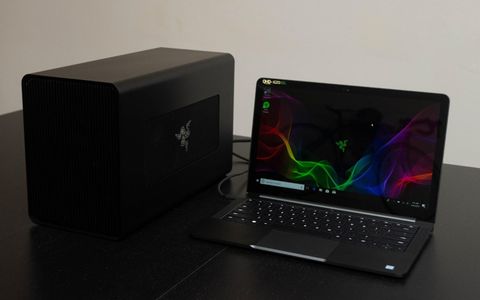
An external GPU enclosure is often an expensive addition to a gaming setup, but Razer’s Core X is different. The $299 eGPU is barebones, but still has the looks and performance of the company’s more expensive models. It’s a little bulkier, but it’s easy to use, and it’s hard to argue with this competitive price point.

Specifications
| Input & Output | Thunderbolt 3 via Type-C |
| PC Requirements | Windows 10 64-bit with Thunderbolt 3 port, MacOS High Sierra 10.13.4 or later |
| GPU Type | Single double-wide, full-length, PCI-Express x16 |
| Internal Power Supply | 650W |
| GPU Max Power Support | 500W |
| Dimensions (WxDxH) | 6.6 x 14.3 x 9.1 inches |
| Max Inner Dimensions (WxDxH) | 2.4 x 13 x 6.4* inches (*Height measured from top of PCIe connector to bottom of locking pin ramps) |
| Included Cables | Power Cable, Thunderbolt 3 Cable |
Exterior
The Razer Core X is the spitting image of Razer’s more expensiveCore V2, but larger at 6.6 x 14.2 x 9.1 inches. The case is constructed out of hefty metal with a black painted exterior. There are cutouts on each side of the outer shell, providing cool air to the Core X’s internal fan and your GPU. The front of the case features a slotted design while the bottom has a wide rubber foot to keep the case stable.
Interior
The Core X features the same simple sliding mechanism in Razer’s flagship V2, which makes it easy to open. Pulling the rear folding panel unlocks the mechanism, allowing you to pull the GPU dock out. Just be sure not to carry the Core X by this handle, as this will cause the exterior case to slide off.
Most of the Core X’s bulk can be attributed to the included 650W SFX power supply, which makes it considerably wider than its predecessor. While it isn’t as elegant as the Core V2, the PSU allows you to install more power-hungry GPUs, up to 500W.
The internal motherboard is simple. Front and center is the PCIe x16 slot for your GPU. Before you install your GPU, you need to remove the placeholder bracket, which comes with a thumb screw. To release the GPU, you just to push a small switch on the front of the PCIe slot.
The motherboard receives power from the 8-pin and 24-pin power connectors on the top left of the board. Two 8-pin power cables are routed from the PSU to the intake fan using Velcro straps, so it’s easy to plug into your GPU.
You’ll find a 4-pin fan header in between the motherboard power connectors, which leads to the 120mm fan. The fan is screwed onto a plate protruding from the case, so you can presumably remove it and install your own fan of the same size.
największy wybór ofert
274,9 zł - Transmiter Bluetooth Adapter Bose QC25 Słuchawki
SPRAWDŹ

Finally, a Thunderbolt 3 port protrudes from the motherboard to the back of the Core X for data and charging.
Software
The Core X is compatible with all of Razer’s Thunderbolt 3-enabled laptops and can support other laptops with Thunderbolt 3 (though your mileage may vary). Your system will need the latest Thunderbolt 3 drivers, graphics drivers, and Windows 10. Mac users on macOS High Sierra can use the Core X, too, but only with AMD video cards. Finally, laptops with discrete graphics cards, such as the 15-inch Razer Blade will need Razer’s GPU Switcher software to allow the laptop to switch between internal and external GPUs when plugging and/or unplugging the Core X.
Feel got helped, support the blog by buying me a coffee


Comments